Did you know that WordPress powers more than 30 percent of the internet? This is a big number considering how vast the internet is. This article will tell you everything you need to know about how to use WordPress.
WordPress has become the platform for online publishers … and for good reason!
WordPress provides flexibility to build the website or blog you want, like no other. It’s a good choice if you are a small business owner looking to:
- Take your business online.
- Create awareness about your business.
- Share valuable insights via blogging.
Keep reading for step-by-step instructions on how to get started with this powerful tool
How to download and install WordPress
The first step in learning how to use WordPress is installation. There are two primary ways of installing WordPress.
The five-minute technique
This installation option will help you customize your website as per your exact needs from the very start. However, to be honest, this method will take a lot longer than five minutes to familiarize yourself with, download and install — especially if you don’t know anything about WordPress. If you are keen to follow this approach, here’s how to do it.
The one-click approach
This option, when done with the help of a web host, is quick but will require you to customize later. The silver lining is that you can take your time to understand WordPress as you start using it and then build your blog or website in the best possible way.
GoDaddy has become the go-to web host for WordPress, especially in India, because of the ease of use and broad range of packages it offers users of all types — from a new SMB owner to a skilled blogger. It eliminates the aforementioned complex installation process, while shaving off 40 percent of the installation time.
GoDaddy’s WordPress Website product includes a free domain name and business email.
Depending on the plan you choose, you can also get an SEO wizard (Deluxe and Ultimate plans), SSL certificate and malware scanning (Ultimate plan).
Learn your way around
Logging into your WordPress administration page is fairly simple. You will be provided with a login link once you install WordPress. Just click on the link and key in the username and password you set up during installation.
Howdy! This is how WordPress greets you every time you log in.
Alternatively, you can type your new site’s domain name into the address bar, followed by /wp-admin. So, if your domain name is www.scribes.com, your login link will be www.scribes.com/wp-admin. You can then enter your username and password to log in.
Welcome to your WordPress dashboard
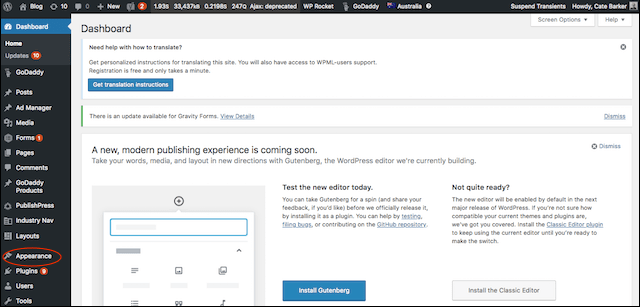
Once you log in to your admin page, you will be taken to your Dashboard. Here is where all the magic happens. Whether you want to create a website to sell products online or the most stunning travel blog, your dashboard will give you all the tools you could require.
Before you start customizing your site or blog, take a look at the theme that is pre-loaded in WordPress. A theme determines how your final website will look and work. You might find that the theme that comes with WordPress fulfils most of your needs, making your work easier.
To see the default theme, click Appearance > Customize in the left toolbar. Spend time checking out the layout — header, menu, main content area, widgets and the footer. All of this can be adjusted to suit your business personality, tone and need.
You can change the colours, add your logo, tagline, social handles and more.
If this theme is unsatisfactory, you can check out the other free themes that come with WordPress and narrow down on a more suitable choice. Select Appearance > Themes to browse some other options. (Note: Not all WordPress themes available online are compatible with GoDaddy's WordPress Website product.)
Now let’s look at the menu on the left of your dashboard to understand how to navigate the WordPress builder.
Posts
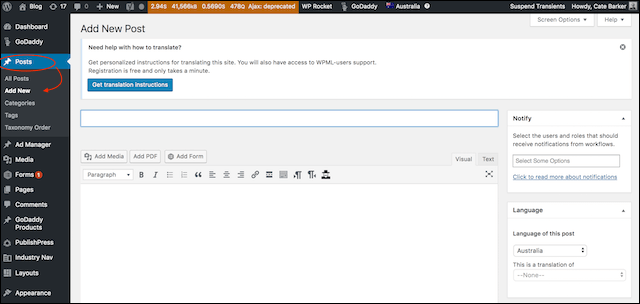
This is where you will add new blog articles (use Pages for static content). Once you click Posts > Add New, it will open the form above, for you to fill. All you have to do it is add the title, the main content of your blog post and any photos or videos you might want to embed in the post.
The formatting tools are akin to Microsoft Word and easy to follow. You can also add keywords in tags, an author name and a short description of the post that will display in Google listings.
After previewing your finished post, you can either Schedule the post for a later date/time or hit Publish. The post will then go live on the internet.
Categories are what help your readers find articles of most interest to them. You will have to create these categories as per your needs. For example, for a travel blog you could categorize posts based on different countries or type of trips (budget-friendly, cultural, eco-tourism, etc).
Media
This is essentially where all your photos, MP3s, audio files or other audiovisual elements get stored. Once you upload a photo or video, it automatically gets stored in your Media Library. You can then retrieve it later and embed it in blog posts using Add Media below the title field.
Pro tip: Rename your photo or video every time you embed it to include the keywords you’ve selected for that post. Learn more about keywords here.
Pages
Pages are used for information that doesn’t change often. This includes pages such as:
- About Us.
- Contact Us.
- Our Services.
These are individual pages with information about your company, vision and core expertise. They represent your organization and the content you put out needs to be well thought through.
Comments
You can allow your readers or customers to comment on posts via this optional feature. You can control and manage comments by using filters to moderate the language and contents. You can also review comments and approve them before they are published so as to avoid getting spammed.
Appearance
This is where you can change the theme of your website. As mentioned before, a theme determines how your final website or blog will look and work. Here you can choose from a number of free themes, or install and activate new WordPress themes you find online. Every theme comes with its own installation instructions.
There’s more information on how to change themes here.
Plug-ins
Plug-ins let you add features to your WordPress blog or site that do not come with the theme you’ve selected. There are thousands available online. For example, there are plug-ins for:
- Analytics to see who’s reading your posts or pages.
- Search engine optimisation (SEO) to bring more people to your blog or website.
- Social media management, to connect your WordPress site to your social accounts.
- A payment gateway to sell products from your website or blog.
You will find additional information on how to use plug-ins here.
Users
If you are using WordPress for a personal blog, you could be the only user. You can visit the Your Profile screen to edit your information. However, if you are building a media blog or if you want multiple users to access your WordPress login page, you will have to add and manage users via this feature. WordPress allows you to give varying levels of access/control to different users.
Tools
If you want to import content from other sources or export your content, the Tools feature will come in handy. It will also enable you to upgrade your WordPress software to a new release. It’s important you do this promptly whenever a new update comes out for security reasons. The sky is the limit.
Choosing a theme
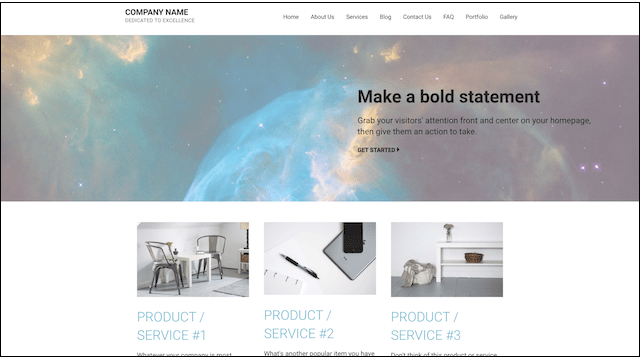
Themes are important because they determine the look and behaviour of your blog or website. Designed by WordPress developers and users, there are thousands of themes available for you to choose from.
WordPress comes with a theme pre-installed.
If you wish to change to a different theme, go to Appearance > Theme in the left toolbar. Here you can view additional themes, or upload one you find online via the Add New button.
Previewing new themes
To quickly change the theme, simply click the Activate button under one of the themes listed, then click on your site name in the top toolbar to see how it looks. If you’ve already added content to your blog, it will appear in the new layout.
Don’t like the new theme? Go back to the Appearance > Theme and click the Activate button under the previous theme to bring the design back to what you had. To see it again, click your site name in the toolbar.
Once you have gotten a hang of how WordPress works, look at improving the look and feel of your website or blog. Try your hand at making it more engaging and easy to navigate. Use plug-ins to optimise your website and drive traffic. Maintaining and improving your website is an ongoing process. Keep yourself updated on the new versions of WordPress and added features to ensure your website or blog stays on point.
How to use WordPress in summary
Whether you are an SMB owner or a budding lifestyle blogger, WordPress is an excellent choice for bringing your dream to fruition.
In the beginning, advanced features might seem daunting, but these tech skills are actually easy to learn using the many resources on the web. Invest the time and energy required, and you will gain a completely customised blog or website as a reward.
Resources
How to download and install WordPress?
How to create WordPress database and username?
What is the difference between pages and posts?