Set up my domain
Congrats on getting your new domain! You've taken an exciting first step in your online venture, and with so many ways to use a domain, it can be hard to choose what to do next. So we've lined up some options to get started—watch a video to get ideas, or select one of the tabs for info on other options for your domain.
More of a visual learner? We've got some great tutorial videos for you to watch and (hopefully) be inspired by.
An intro to domains
Use your domain for your business
Updating contact info on your domain
Manage domain renewals
Create a website with Websites + Marketing and publish it on your domain.
- Go to your GoDaddy product page.
- Scroll to Websites + Marketing and select Manage next to your website to open your site.
- Select Edit Website or Edit Site to open your website builder.
- Select Settings.
- Next to your domain name, select Manage.
- If asked, select I already own a domain.
- Select Choose a domain or Change my domain.
- Select the domain you want from the list or enter your domain and extension without www in front. For example, enter mycoolsite.com not www.mycoolsite.com.
- Select Continue.
- Check the domain is correct and it's the selected option. Then select Save & Publish or Save. Your changes won't be visible to other people until you publish.
Create a professional email address using your domain with Microsoft 365.
- Sign in to your Email & Office Dashboard (use your GoDaddy username and password).
- If you already have an existing Microsoft 365 email address from GoDaddy, select Add user. If this is your first Microsoft 365 email address, move on to the next step.

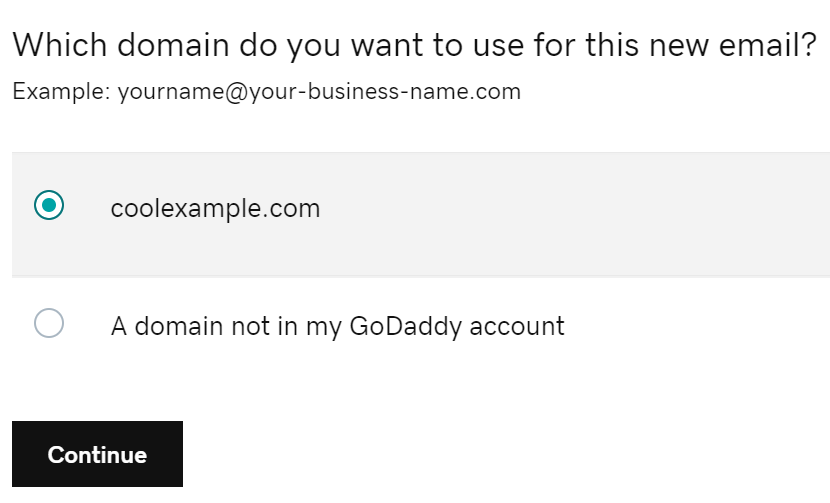
- Choose the domain you want to use and select Continue.
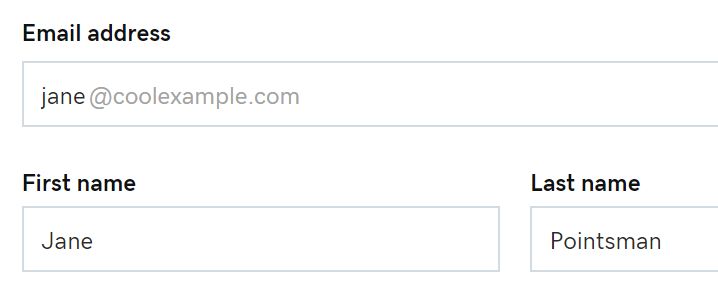
- Create your Email address. Avoid using numbers or special characters, since they're harder for people to remember and write. (For example, use your name like jane@coolexample.com or jpointsman@coolexample.com.)
- Enter your First name and Last name
- For Link domains, use the drop-down menu to choose Do not share. (Linking domains allows users to share contacts and files, such as if the domains are part of one business.) If this is your first email domain, you won't see this option.
- Select Yes to assign administrator permissions to this account. Or, if you already have an email account, you'll need to choose if the new email being set up is for you or someone else.
- Enter a unique password in the Create a password box. (It's important to create a password that's different than your GoDaddy password.) If you already have an email account, select Create my own password first.
Note: If you're creating an email address for another user, use a temporary password so they can change it later.
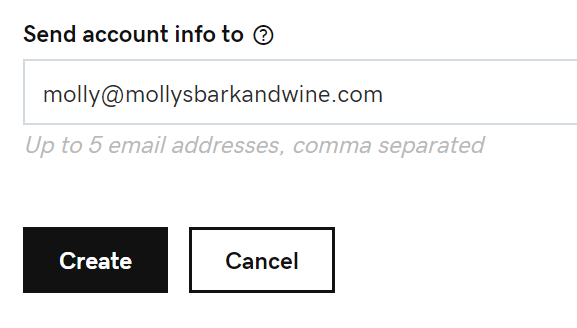
- Enter your previous email address in the Send account info to box.
- Select Create. When your Microsoft 365 email address is ready, you’ll receive confirmation at your previously provided email address.
It can take up to 24 hours for your email address to be fully functional.
Forward your domain to a different URL and connect to a separate website, social media page, or even your favorite YouTube channel.
- Log in to your GoDaddy Domain Control Center. (Need help logging in? Find your username or password.)
- Select your domain name from the list to access the Domain Settings page.
- Under Additional Settings, select Manage DNS.
- Under Forwarding, select Add next to Domain or Subdomain. If you select a subdomain, enter the subdomain (maximum of 25 characters) in the Subdomain field.
- Under Forward to, choose http:// or https:// for the destination URL your domain will forward to.
Note: This field is specific to the destination URL only. The domain being forwarded will not be SSL enabled or forward over https, as that functionality is not currently supported. You may be able to set up https–enabled forwarding through your hosting platform.
- Enter the destination URL in the blank field. This is where we'll send visitors to your domain name.
- First and last characters must be a number or letter
- Periods (.) are supported
- Maximum of 1000 characters
- Consecutive periods (…) are not supported
- Underscores (_) are not supported
- Under Forward type, select 301 or 302 redirect.
- Choose your forwarding Settings to determine how your redirect will function:
- Forward only: Redirects to the site you specified in the Forward To field and the destination URL will show in the browser address bar.
- Forward with masking: Redirects to the site you specified in the Forward To field and your domain name will show in the browser address bar instead of the destination URL. Enter your details for at least one of the Meta Tag types:
- Title: A short phrase (maximum 80 characters) that displays on the browser tab and in search results.
- Description: A short description (maximum of 150 characters)of your website to display in search engine results.
- Keywords: A list of keywords (maximum of 500 characters) that describes the content and purpose of your website.
- Select Save. We'll automatically update your domain to GoDaddy nameservers if they aren't with us.
Most DNS updates take effect with an hour but could take up to 48 hours to update globally.
More info
- Protect your domain from accidental expiration and unauthorized actions by upgrading your protection level.
- Use two-step verification to protect your entire GoDaddy account.
